Hi, I'm Rachel.

A few years ago I could barely boil water.

True story.

Determined to be a kick ass wife, I developed a love for football and learned to cook in my tiny Jersey City kitchen. I spend my days working in Manhattan, my nights and weekends chasing after a rambunctious toddler, and the hours in between cooking with my husband and feeding my TV habit...oh, and I blog about it all! 

Welcome to my world!

Search for Recipes & More!

Subscribe via Email:

Delivered by FeedBurner

Still Hungry?
my foodgawker gallery
Search for Recipes & More!


Subscribe to TAA by Email!

Delivered by FeedBurner


Follow the Food

The Pantry

Entries in DIY (20)

Tuesday
Oct182011

My Kitchen Office Nook: Phase I

I'm so super excited this morning. Last night I came home from work to a home full of light! We {finally} got the electrician here to install lighting in 4 spots around the apartment and I cannot believe the difference it makes! I'll be back with photos once the walls are painted since honestly, the pics just do not do it all justice. But just know that I'm one happy lady :)

Meanwhile, I'm also making a lot of progress on my kitchen office nook. It's only half way there, but I want to share some in progress updates with you since this tiny change has made such a difference in my life!
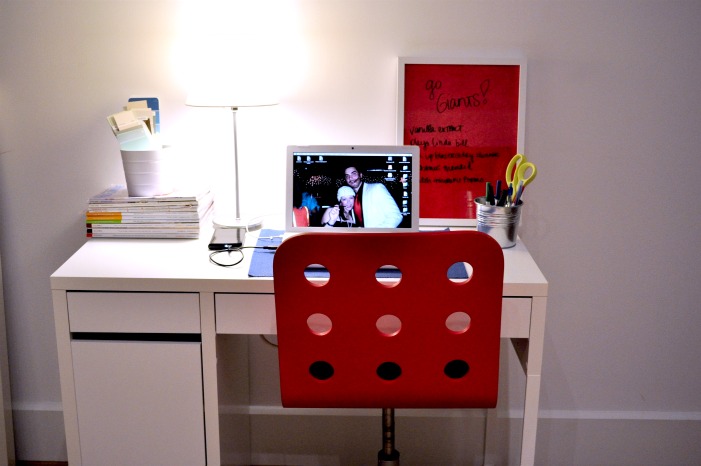
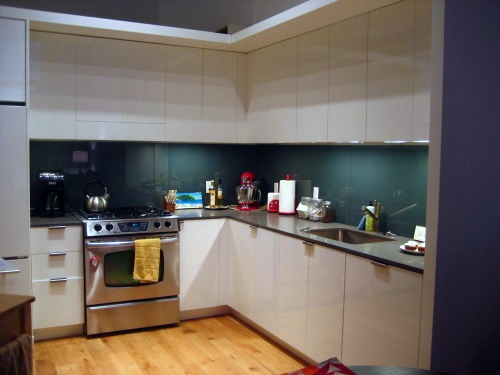
Ta da!

Please forgive my dark photos. There are no windows near by this area in the apartment, so there's simply no way to get a great photo. I took this one last night and digitally lightened it up a bit. But you get the idea.

Who would have thought that adding a simple white desk and a few other small changes would make such a difference!

Let's get down to some details, shall we?


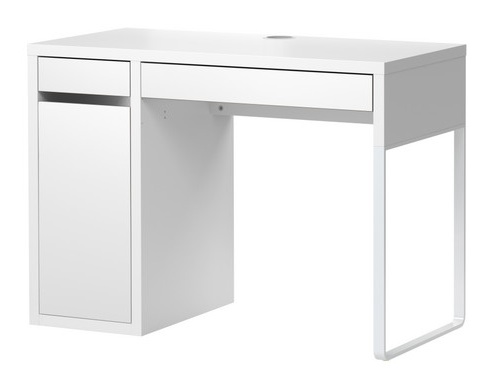
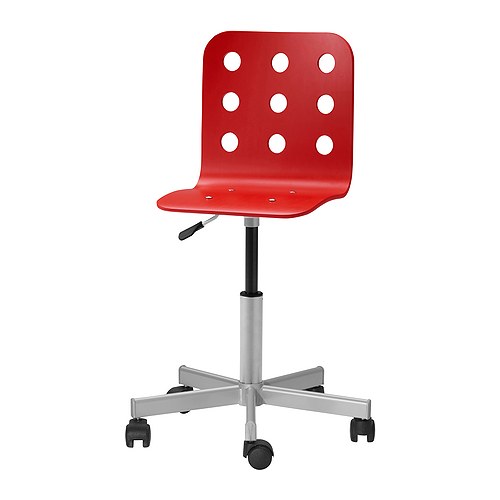
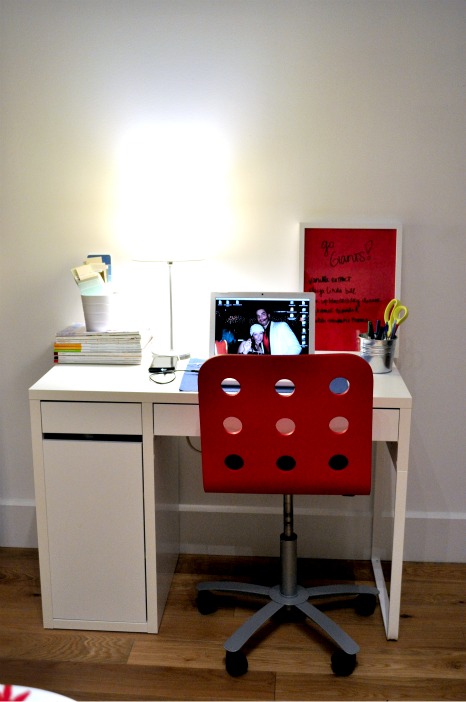
I picked out the Micke desk from Ikea because it was small, not very deep and sleek white. I wanted it to match the kitchen cabinets (which are white laquer) and not take up a ton of space. Luckily the desk was extremely reasonably priced and just the right size. We already owned the red chair (which we lovingly call the Swiss cheese chair), also from Ikea, also reasonably priced, and already matches my red-themed kitchen.

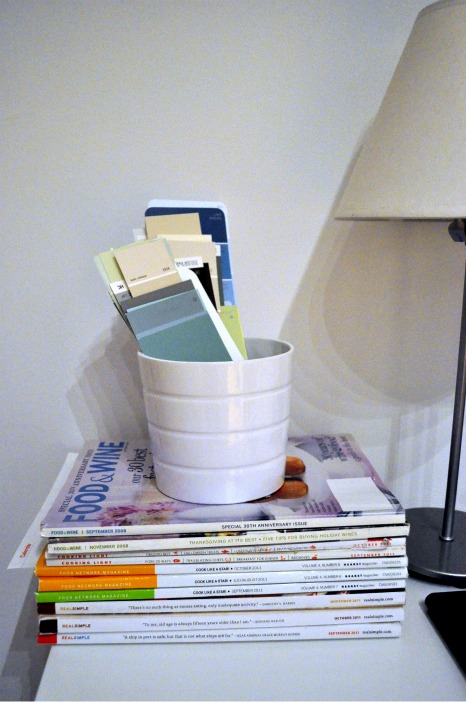
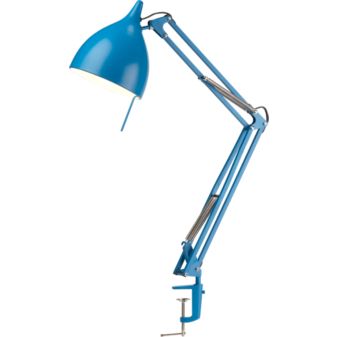
Starting on the left side, I stacked up my unread magazines (I have a lot of work to do in that department!) and set a white Ikea planter on top which holds some paint swatches that I'm considering for various spots in the apartment. You'll also notice my skinny little lamp. This is a super old find from Target that we've had laying around for some time now. I have no idea why I didn't throw it away, but it works great as a simple lamp and doesn't take up much space - a double win!

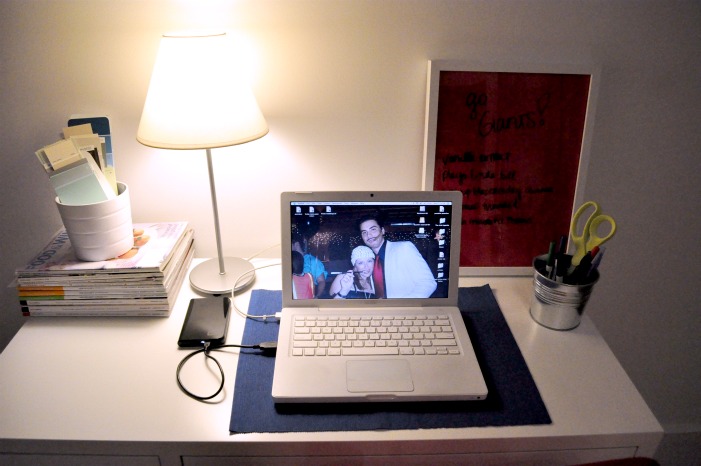
The main goal of the office nook was to have a spot for my Macbook so that I can blog with ease and not in front of the television while watching Good Morning America. I stacked it on top of a cobalt blue placemat that I snagged at Ikea for a couple of dollars. You'll also notice my computer background image is a throwback Halloween image of the man and me :)

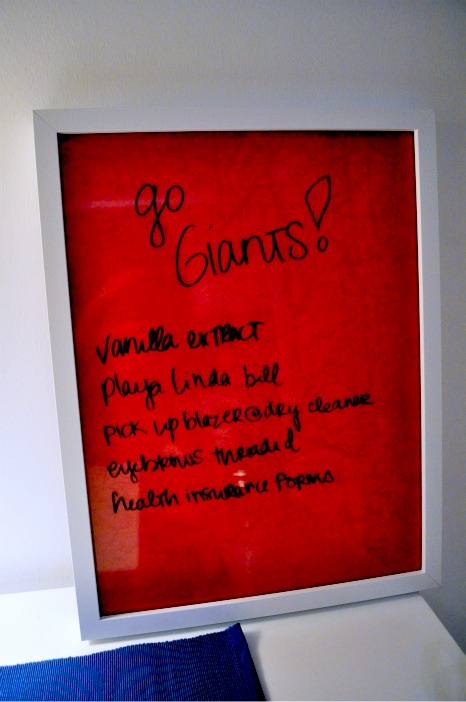
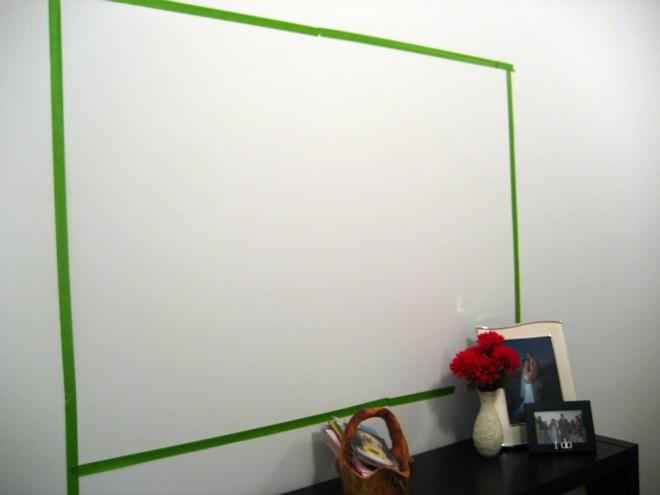
Next to the computer is my DIY dry erase board! I've been wanting to make one for some time now. I simply picked up a large frame, covered the inside with a piece of red fabric and put the fram back together. Voila. A simple and adorable DIY dry erase board. My favorite part of this is that the fabric can easily be changed out whenever I'd like! I can't wait to get a holiday themed fabrice going in there! Oh and the dry erase marker wipes right off with a tissue (or with your finger ;))

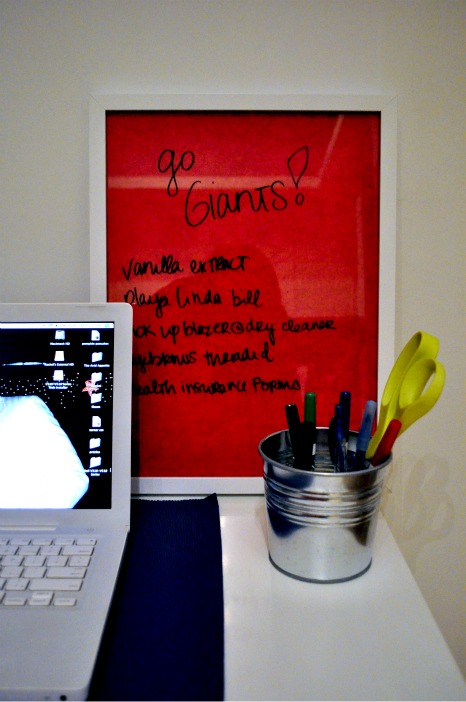
Pulling back out a bit, you'll see I also added a pen cup, which consists of another Ikea planter. I filled the bottom with rice and added my dry erase markers, a few pens and a pair of scissors. I love the industrial vibe on this planter - it perfectly complements our loft-style apartment!

So there you have it! My DIY kitchen office nook, in its first phase.

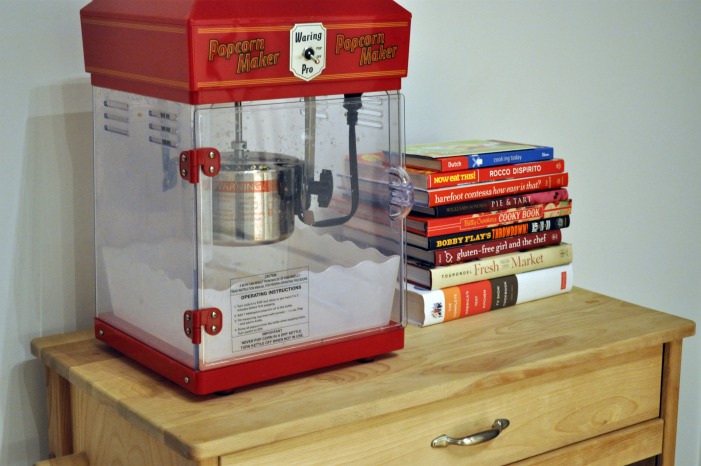
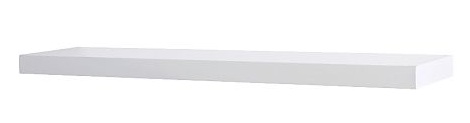
Phase II will consist of painting the wall behind the desk (which will hopefully make all of that white pop!), adding a few other organizational fixtures and hanging some shelves overhead for some open storage options for my extensive cookbook collection as well as my binders which contain all of my files. They are currenly all hiding in the den and are extremely unaccessible there. I can't wait to install them!

Questions of the Day:

Do you ever repurpose things from around your home? I repurposed the little planters, the placemat, the Swiss cheese chair and the lamp!

Do you have a desk for your computer? Or is it a roving machine, as mine used to be?

Tuesday
Sep272011

Creating a Kitchen Office Nook

Last week I told you about my plans to put in a kitchen office nook. While we have a small second bedroom in our apartment, Shaun has his desk in there, plus a couch and some other basic storage (ok, it kind of serves as a giant storage closet for now). Currently, I have no real place to store my Macbook, magazines, mail, paperwork or cookbooks and I'm in dire need of one. We have a small space on one side of the kitchen that could not only use some sprucing up, but could also serve as the perfect spot for my little office nook!

When I pitched my idea to Shaun, he completely agreed that I needed a space for my things and an official desk for blogging and other projects. The nook will go to the left side of the kitchen where we have an empty wall. Currently, that space looks like this:

It's fine, but not exactly the most space-efficient. We barely use the butcher block for what it's worth since we installed a kitchen island (pics to come!) and right now it sloppily holds only a fraction of my cookbooks.

Here's the plan:

Put in a small, sleek desk that will match the white laquered cabinets. I found this MICKE desk from Ikea which is the perfect size and the price is right.


Install 2 staggered floating shelves which will house my cookbooks for easy access. I can also use this space for a few photo frames and perhaps a small decorative basket to hold my dish towels and pot holders (which currently reside in the butcher block). I like these white LACK shelves from Ikea for just $19.99 a pop.

Though the desk has some storage, I'd love to install a letter tray or wall letter holder. It's decorative and functional. And that I love. This one from The Container Store is my favorite as of late.

My computer will sit in the middle of the desk, but I'll need some other accessories including an industrial-style desk lamp like this one from CB2.

I also plan to make a DIY dry erase board for blog ideas, notes, grocery lists, etc. I'll keep you in the loop on how I get 'er done, but I already purchased a large Ribba frame from Ikea this weekend which will serve as the base!

Lastly, I'll need a good chair. For now, I'll use a red rolling chair that we already own, and one that will match my red kitchen. I plan to get a better one at some point, but for now, this will do!

So there you have it. My plans for a kitchen office nook. I'm so excited about this! I already have some of the supplies, now it's just a matter of building and hanging. I'll keep you posted as the project rolls around!

Questions of the Day:

Do you have a personal space that's all your own?

What's your favorite part of it?

Any suggestions for my kitchen office nook?


Tuesday
May102011

How to Create a Gallery Wall

I had been wanting a gallery wall in our apartment since...oh, forever.

When we finally purchased a place of our very own, I realized that this was my chance. I am semi-obsessed with taking photos and I hate that nowadays, most photos don't even get printed, but filed away into virtual folders. I love to see the photos I've taken, whether travel photos, family photos or throwbacks. So a gallery wall was the perfect solution to our {very} empty and unpainted entry way.

I found this process to be daunting at first, and then realized it was very simple and dare I say it, fun. I did the wall in 2 parts since after living with the first half for a few months, I realized that I wanted to extend it even further. I did this in 2 different ways, so you can simply choose whichever one works for you.

First thing's first, map out the space you want to use with painter's tape. I used measuring tape to make it all even.

I then laid out a sheet on the floor, folded to the size of the mapped out framing area.


On the sheet, I put together my frame layout. I found this to be the easiest way to move things around until I found the design that felt right (and fit in all of my frames). This also avoided hacking up my wall while moving things around. Then, I snapped a photo of the layout so I could reference it while I was hanging the actual frames. Lastly, I just filled in the wall, hanging one at a time. I used picture hangers which hold way more than enough weight to sustain my meager Ikea frames. My favorite part about this method is that since it's a gallery, nothing needs to be perfect. I did not space anything perfectly, I wanted it rustic!

Once I worked up the strength to finish the wall (months later mind you), I used a slightly different and even less precise approach. I also moved some things around!

To finish the wall, I took stock of my remaining frames and photos. I outlined each one with wrapping paper and hung the wrapping paper with painters tape to show how the frames would look on the wall. Then, I hammered a tiny hole into the center of the painters tape, removed the paper, finished hammering and hung the photos. Easy peasy.

Here are some close ups for your viewing pleasure! Red is kind of a theme in our home right now,

but what I love about the gallery wall is that I can always change out the frames once we paint (to all white, perhaps?) and even the photos as we make more and more memories!

Starting from the bottom left side of the wall, I included a photo of a Divi tree, which was also the favor at our wedding; our wedding program; a photo of my bridesmaids and me at my wedding; Shaun and I in front of the Montana River; my family at our wedding; a throwback photo of my sisters and me.

Next up: A view of the Seine River from the Eiffel Tower; Shaun and I at our Senior Prom; throwback of Shaun and his brother; Shaun and me sipping lattes in Prague; Shaun's fam at our wedding; my parents at our wedding; his parents at our wedding.

Cartoon mouse & cat kissing; sisters & me at Penn State; Shaun & me at Yanks v. Mets game; Eiffel Tower; our dads at our rehearsal dinner; ampersand, painted by yours truly; my family's dog {and my baby} Chloe; Shaun & me in a photo booth, circa 2004; Keep Calm & Read Blogs, designed by yours truly; pencil drawing we purchased in Tallinn, Estonia

Central Park print, gifted to us from my sisters

Our wedding party; heart print I copied and doctored (I plan to buy the original at some point!); A view of the mountains in the Grand Tetons; throwback photo of my dad and me; a bison; Mom and me; Shaun with his mom and brother

So there you have it. Honestly, this was such an easy project and was totally worth the work. I love stopping in to look at it each day as I leave the house and come home. It just makes me happy. And I love that we can change out photos whenever we'd like!

So what do you think? Are you a "photo" person? Do you own any cool prints? I'm always on the hunt for new ones!

Page 1 ... 2 3 4 5 6 ... 7 Next 3 Entries ยป