Hi, I'm Rachel.

A few years ago I could barely boil water.

True story.

Determined to be a kick ass wife, I developed a love for football and learned to cook in my tiny Jersey City kitchen. I spend my days working in Manhattan, my nights and weekends chasing after a rambunctious toddler, and the hours in between cooking with my husband and feeding my TV habit...oh, and I blog about it all! 

Welcome to my world!

Search for Recipes & More!

Subscribe via Email:

Delivered by FeedBurner

Still Hungry?
my foodgawker gallery
Search for Recipes & More!


Subscribe to TAA by Email!

Delivered by FeedBurner


Follow the Food

The Pantry

Entries in DIY (20)

Sunday
Jan062013

Spacesaving Gift Wrap Station

Part of the fun that's gone along with prepping for Baby H has been reorganizing every other single thing in my home. I've totally become one of those people who has to have everything in every aspect of my life in order before I can possibly bring my baby home. It's nesting on a whole new level.


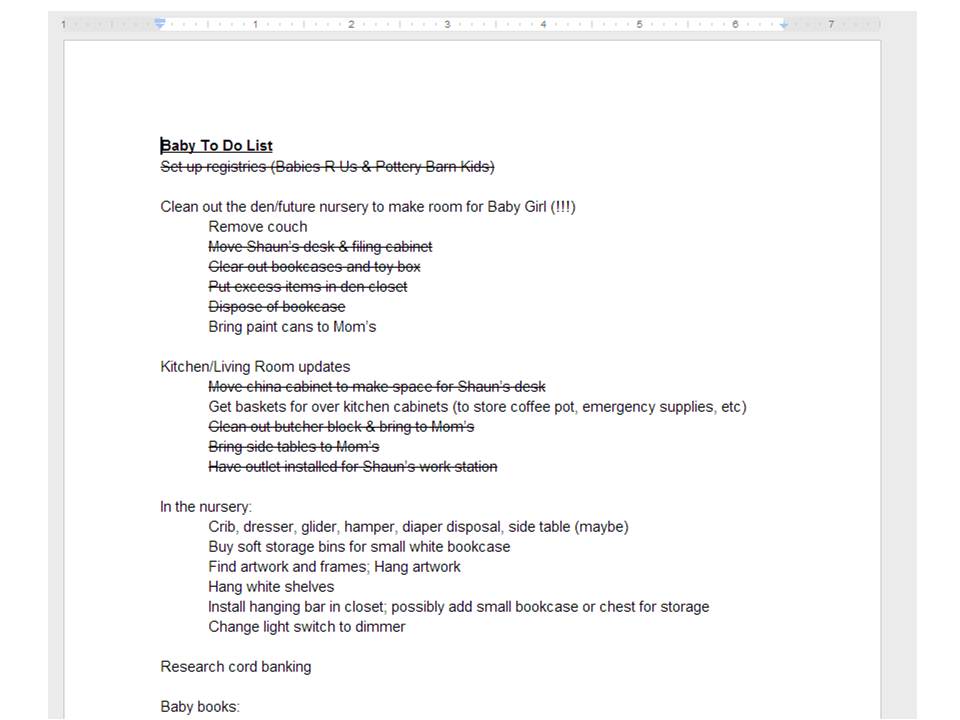
When we started cleaning out our den/office/storage room/crapatorium, we had a long journey ahead of us. Not only was the room serving as a dumping ground for anything and everything, but our ginormous closet in that room was also not being used to its full potential. (And as an aside, this is also half of where Baby H's closet will reside and I'll be sharing that fun update later this week!).

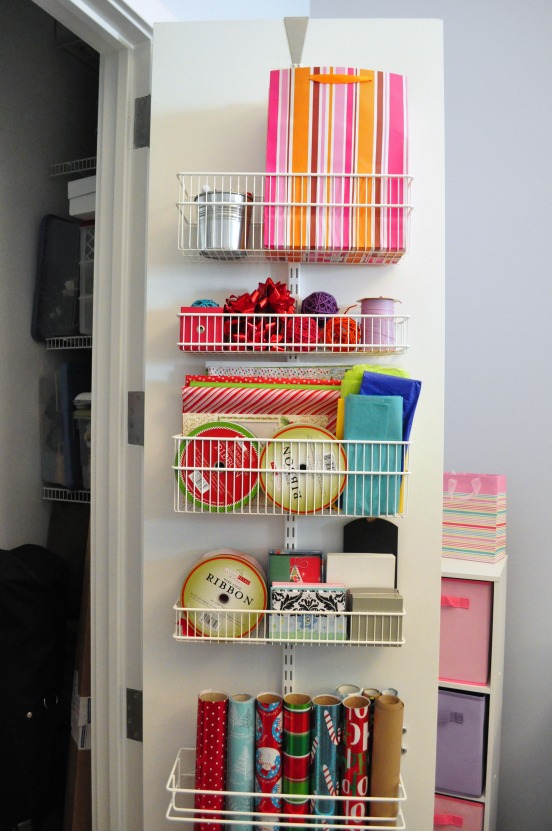
One of my biggest organizational issues has been how to store all of my gift wrap goodies. I love paper, gift tags, boxes, bags...you name it. I started with an overflowing open basket of random crap stuff and towering rolls of wrapping paper that fell everytime I tried to get into the closet and after seeing this tutorial  transformed it into this little gem of a gift wrap station. 

We started by hanging a commercial door hook (we have large, thick doors) and adding the longest track they had. In fact, on a normal sized door, you would also use the bottom hook that is provided to secure the whole thing in place, but since the track didn't make it to the bottom of the door, Shaun simply added a few screws along the track to secure it.


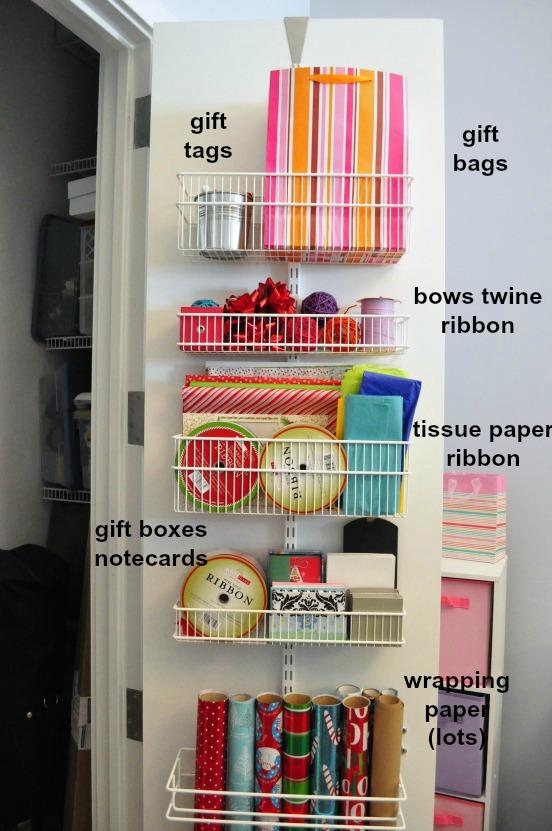
I realized that we have super tall doors, the insides of which were completely untouched. Talk about finding space where you least expect it! When I saw that this could all be done so simply with the elfa system from the Container Store, it was a no brainer. (Oh and as a bonus, the system parts are all 30% off right now!)

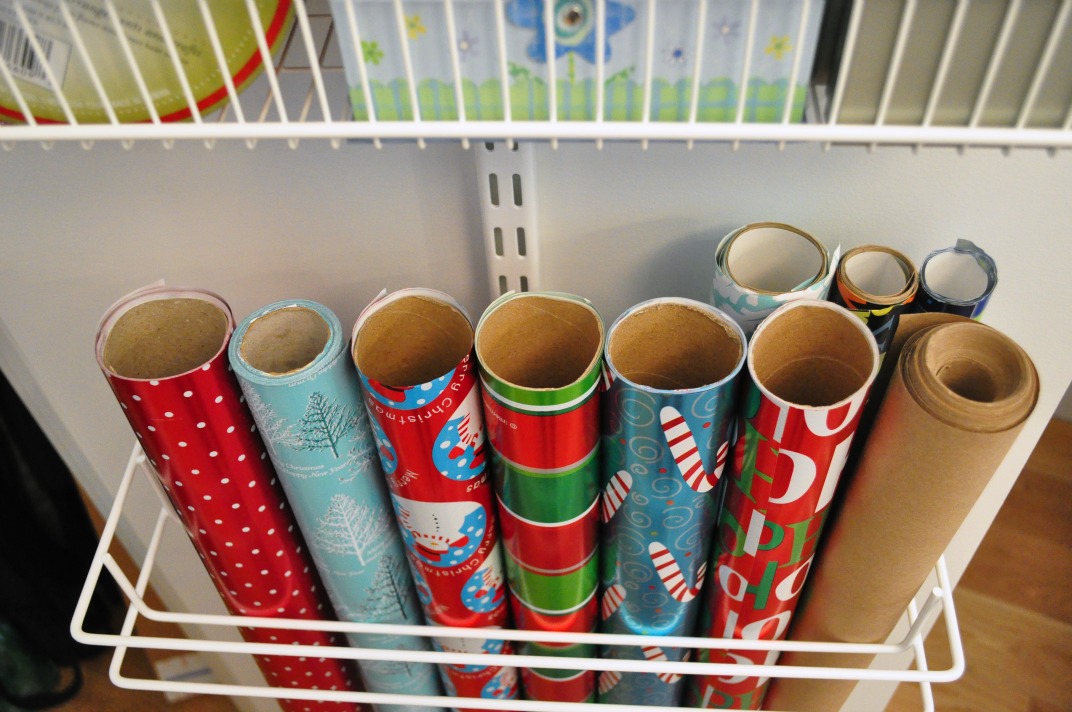
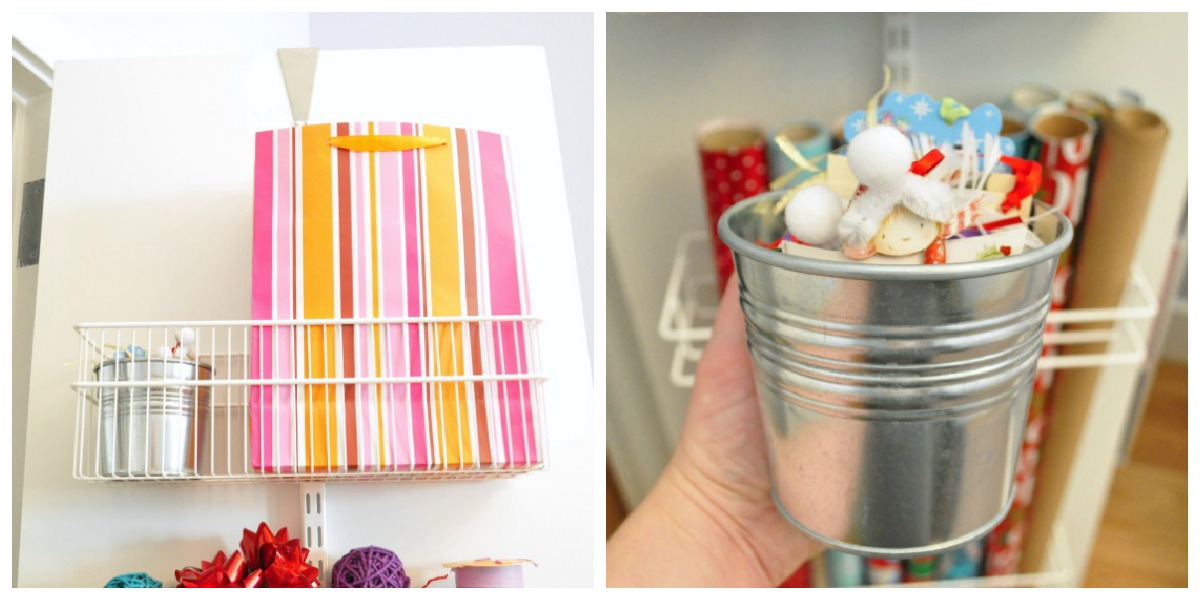
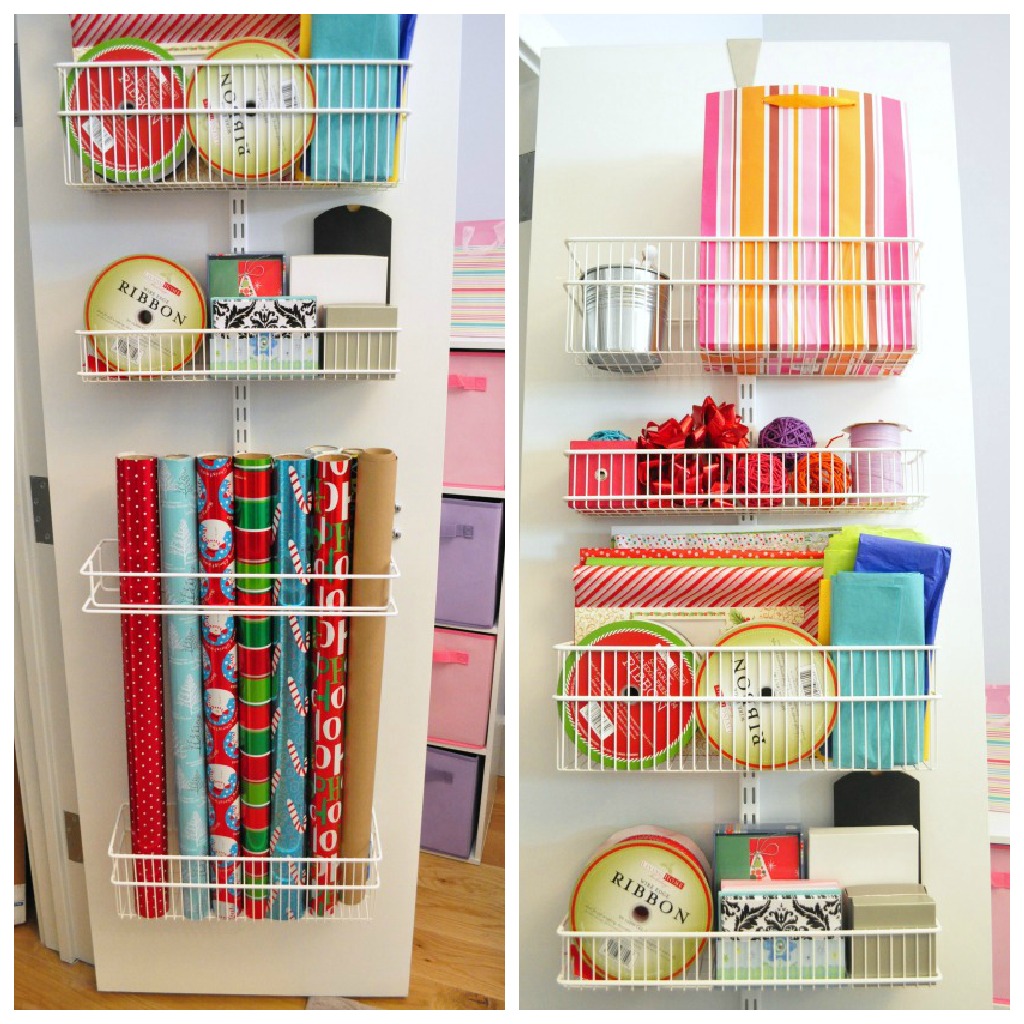
After hanging the track, I used a deep basket with a media organizer to hold all of my wrapping paper in place. Can you tell that I love Christmas paper? Thicker rolls in the front, skinny rolls in the back with plenty of space to add to my collection.


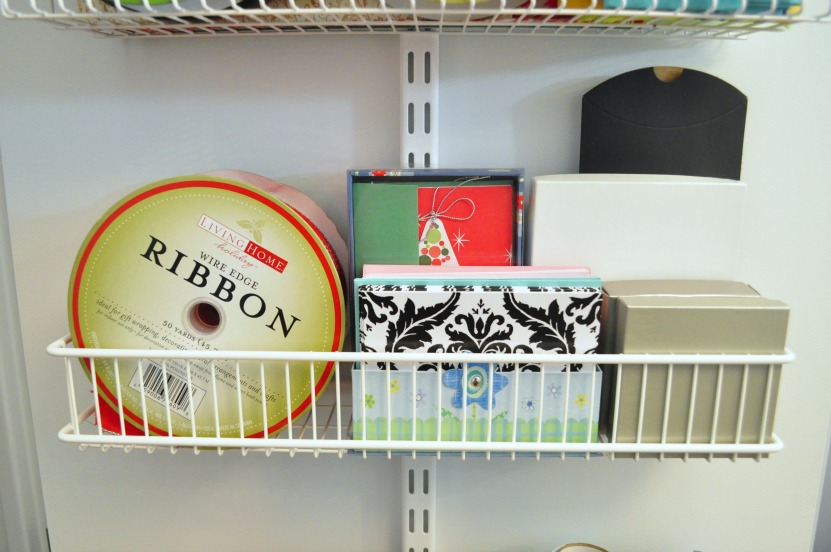
In a shallow basket, I set up some little gift boxes that I like to keep on hand, along with notecards (somehow those end up all over my apartment and I can never find them when I need them!), and some leftover giant rolls of holiday ribbon. 


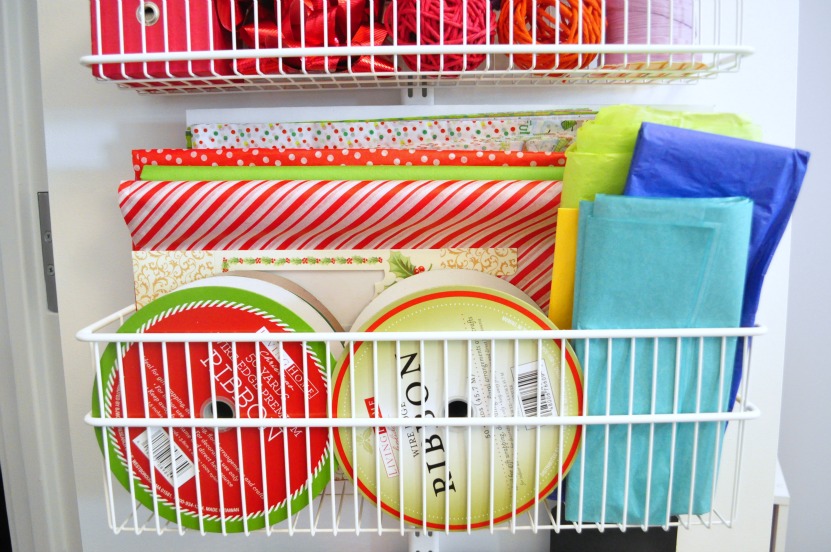
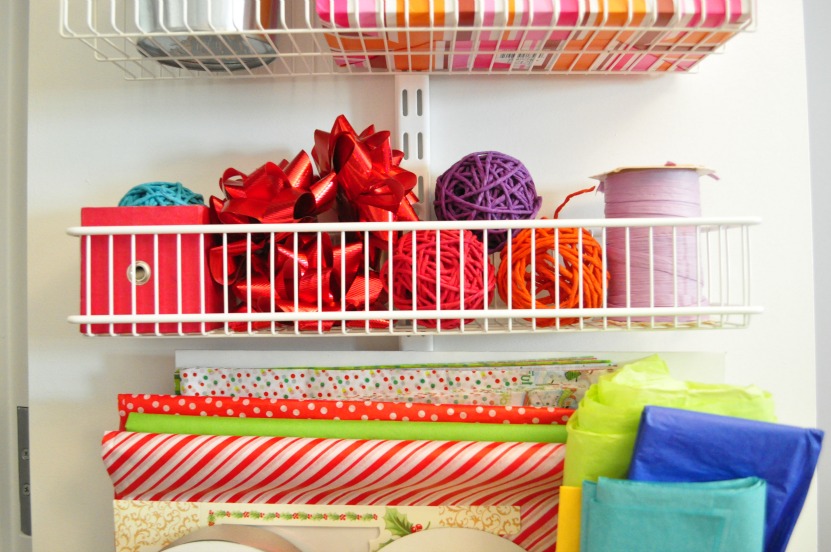
In another deep basket, I folded up all of my holiday tissue paper (I got a huge box of it from BJ's this season, the likes of which will surely last through next Christmas and possibly beyond!). Behind the tissue paper are a few flattened shirt boxes and more large spools of holiday ribbon in the front. Oh and some everyday tissue paper also made its way into the right side.


In yet another shallow basket went all of my leftover bows, twine and paper ribbon. I love having these little things on hand to really dress up a gift!


And finally on the top, I used one more deep basket for a little Ikea planter filled with gift tags (again, mostly holiday-themed...gotta love BJ's!) and a large gift bag filled with other gift bags inside.


So there you have it.

The elfa system doesn't come cheap, but I am so in love with the look and functionality of this that now I'm on the hunt to transform every door in my home to one of these systems! No more baskets of random wrapping stuff, no more searching to see if we have tissue paper hidden somewhere, no more 10 rolls of wrapping paper falling over in the closet at any given moment.


I've never felt so accomplished! Oh and yes, I'll even go in there from time to time to gaze lovingly at it!

Happy Monday friends!

What's the last organizational project you instituted?

Do you have a magic gift wrap storage solution?


Wednesday
Oct242012

Lavender + Light Blue Nursery for Baby Girl

Since I announced that I had a little something special cooking, I've gotten a lot of questions about what we plan to do for Baby TAA's nursery. 

This has been one of my favorite projects that I've ever tackled. Picking out sweet and soft baby things for the room where we'll take home our little baby girl...well, it doesn't get much better than that!

I've never been a 'pink' girl, even as a child. And I knew that our baby girl's nursery wouldn't be filled with pink either, but instead serve as a pretty accent color. When we had our home painted last year, I intentionally chose a light, soft blue for our 2nd bedroom knowing that it would also work perfectly for either a baby boy or baby girl someday. With light blue as a base, I started planning the nursery. To compliment the blue, I chose lavender as the signature color, with splashes of light pink and yellow thrown in.

I put together a little moodboard to give a peak as to how I hope it will eventually come together!


clockwise from top left:


Brooklyn Nursery Bedding, Pottery Barn Kids: I took one look at this and fell in love. It's feminine without being overly girly and I adore the mixed patterns and colors. Could it be more perfect for a lavender and light blue nursery? I know the bumper isn't actually supposed to be used until baby is older, but I just love the pretty paisley pattern and so I'm happy to have it for show until it is safe for use.

Baby bunting flag, Etsy: I have seen so many nurseries online that have sweet little bunting flags and I think it would be a lovely addition to Baby TAA's nursery. I found some pink, purple and blue scrapbook paper that I can't get enough of and so I plan to DIY my own with this. I'll keep you posted!

Eden White Pendant Lamp, CB2; When we had overhead lighting installed last year, again I chose this simple white pendant knowing that it would suit a modern nursery someday. And for $59, you can't beat that.

Baby animal artwork, Trafalgar Square's Etsy Shop: What is it about baby animals that just make my heart melt? Though our nursery won't have a true theme, I love animals and so there will definitely be some sweet animal artwork and accents. I'm obsessed with every single print from Trafalgar Square and bonus - they are running a sale that ends today! I also plan to DIY some artwork as well, so I'll keep you posted on that.

Lena Lamb plush, Gund via Macy's: Animal love continues. I love little lambs!

Cosmopolitan Lavender Rug, Overstock.com: I searched far and wide for the perfect lavender rug and finally went ahead and ordered this little beauty. It's in transit as we speak and I hope that it lives up to the plushness and beauty of the photos. Not to mention that the website photo also pictures the rug on hardwood floors which match ours almost exactly. And for the price? Have mercy (yes, I did just pull out an Uncle Jesse reference).

Closetmaid cube & fabric drawers: We actually already own the little white cubby and I plan to order some lavender and pink drawers to hold toys, books and other goodies for my little sweet. I haven't decided yet if it will sit vertically or horizontally...if horizontally, I may also get a nice cushion for the top so Baby TAA can sit on there someday and read :)

Oh and lastly, the color of our walls is reflected on the board. We chose Benjamin Moore's Sweet Bluette for a nice, soft light blue that isn't overly saturated. A year later and I'm still in love with this color!

So that's what I'm loving for our little nursery thus far. We are planning on a white crib and white dresser/changing table so fit in with our modern loft. This weekend we are also getting to work on updating our closet situation and I cannot wait to share that with you in the coming weeks!


What are your favorite nursery must-haves?

Do you prefer themed baby rooms?

If you were designing a nursery for baby girl, what would be your color picks?

Monday
Oct082012

Getting Organized: DIY Baby Prep Binder

Now that I'm officially 6 months pregnant, the reality is starting to set in that our sweet baby girl will be here before we know it. 

One thing that has amazed me throughout the last number of months is how many things to keep track of, prepare for, purchase, organize...and that's all before the baby even gets here! I'd be lying if I said that I haven't had moments of panic, of feeling overwhelmed and of, well, sheer terror. All mixed in with sheer happiness, of course.

But!

I find that the more I organize, the more I read and the more I slowly cross things off of my to-do list, the better I feel. I think there's a reason why women are pregnant for 10 months...so that there's plenty of time to get everything done! Slow and steady wins the race if you ask me.

Over the first few months of my pregnancy, I had paperwork, sonogram photos, doctor's bills, coupons and more strewn in all different places in our home.

I decided to make a little baby organization binder which has helped me wrangle it all together. Oh, and I got a little crafty with it, so I can happily display it right on my desk, keeping it easily accessible for filing and referencing at any time. Oh and getting another glimpse of my sweet baby's face doesn't hurt either :)


Here's what I used:

1 white binder (I used a 1.5" ring)

tab dividers

plastic sheet inserts

scrapbook paper, tape/glue & markers

any & all paperwork, photos, cards, flyers, etc.


First, I gathered up all of my baby goodies. I threw out any paperwork or flyers that I didn't need.

Next, I organized what was left into piles and placed them into the plastic sleeves. Then I placed the sleeves into the binder, separated by these cute (yet still unnamed) dividers:

Some of my categories included:

doctor's information (e.g., baby class listings, pediatrician recommendations, glucose test instructions)

coupons & flyers (like my Babies R Us Rewards card, Buy Buy Baby coupons, etc)

sonogram photos

congratulatory cards from friends & family

doctor's bills, explanations of benefits, etc

baby registry lists with the brands/products I want to research

a giant to-do list before Baby arrives

Once everything was organized to my liking, I decorated the outside of the binder. Using some leftover scrapbook paper scraps (which I purchased to use for a baby book that I'm putting together about my pregnancy...more on that later), I simply found an arrangement that I liked and lightly taped the strips of paper in place. I repeated the same thing on the back panel. Then I added a little sonogram reprint from our 20 week ultrasound. And finally, I cut one long strip for the side binding and simply wrote 'baby humiston' on it in dark purple marker. Voila!


It makes me smile to see this on my home desk and I feel a lot more settled knowing that I have all of the information I need in one place! Not to mention that I'm mildly obsessed with all of these scrapbook paper patterns, so I love that I get to have yet another use for them. I'm also considering using some of them as a mat for framed artwork and photos in the nursery. But that is a post for another time :)

What is your favorite organizational tool?

How do you keep all of your files wrangled?

And for the moms and moms-to-be out there - any other organizational/sanity-saving tips for me?