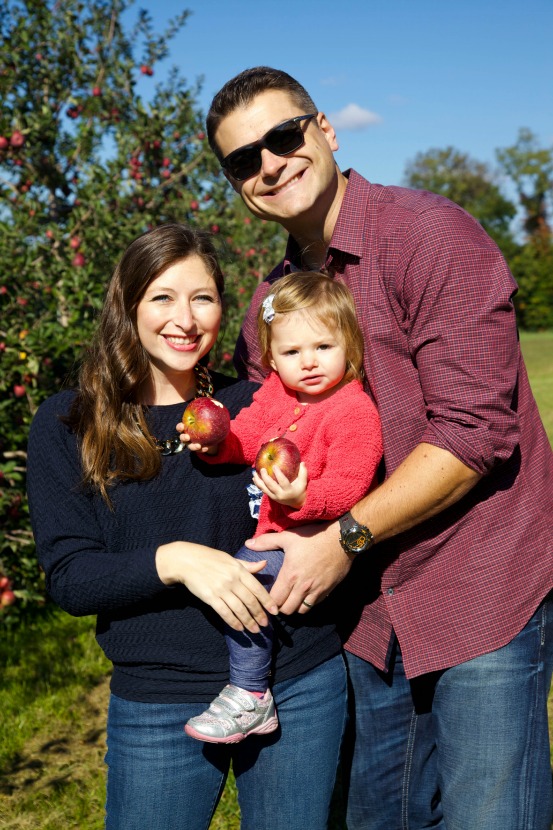
Hi, I'm Rachel.

A few years ago I could barely boil water.

True story.

Determined to be a kick ass wife, I developed a love for football and learned to cook in my tiny Jersey City kitchen. I spend my days working in Manhattan, my nights and weekends chasing after a rambunctious toddler, and the hours in between cooking with my husband and feeding my TV habit...oh, and I blog about it all! 

Welcome to my world!

Search for Recipes & More!

Subscribe via Email:

Delivered by FeedBurner

Still Hungry?
my foodgawker gallery
Search for Recipes & More!


Subscribe to TAA by Email!

Delivered by FeedBurner


Follow the Food

The Pantry

Entries in Recipes (92)

Sunday
Apr112010

Pink Coconut Cupcakes

For Easter last week, I whipped up two full batches of homemade cupcakes. Since it was Easter, the obligatory coconut was in full effect with a Barefoot Contessa recipe that I'd been dreaming about since I made these last Spring for Catherine's bridal shower. Thick and bordering on cornbread-like, these cupcakes are a serious change from the traditional chocolate or vanilla with buttercream. The frosting is made extra fabulous with the addition of almond extract (one of my favorite extracts). Let's get down to the goods, shall we?

Pink Coconut Cupcakes
*Adapted from Ina Garten
3/4 pound (3 sticks) unsalted butter, room temperature
2 cups sugar
5 extra-large eggs at room temperature
1 1/2 teaspoons pure vanilla extract
1 1/2 teaspoons pure almond extract
3 cups flour
1 teaspoon baking powder
1/2 teaspoon baking soda
1/2 teaspoon kosher salt
1 cup buttermilk
1 bag sweetened, shredded coconut plus more for garnish

Preheat the oven to 325 degrees F. In a stand mixer fitted with the paddle attachment, cream the butter and sugar until light and fluffy, about 5 minutes. With the mixer on low speed, add the eggs, one at a time. (Note: I crack the eggs into a separate bowl first, just in case you get a bad one, your whole mixture won't be ruined) Scrape down the bowl after each addition. Add the vanilla extract and almond extract and mix well.

In a separate bowl, sift together flour, baking power, baking soda and salt. In 3 parts, alternately add the dry ingredients and the buttermilk to the mixer, beginning and ending with the dry. Mix until just combined. Fold in 7 ounces of coconut - and don't overmix, or the battern will get tough.

Line a muffin pan with paper liners. Fill each to almost the top with batter. Bake for 25 to 25 minutes, until a toothpick comes out clean (mine took about 25 minutes). Allow to cool in the pan for 15 minutes, then move them to a baking rack to cool completely. Frost 'em.
My Favorite Pink Frosting:
1 8oz pkg cream cheese, at room temperature
1 stick unsalted butter, at room temperature
1 tsp vanilla extract
1/2 tsp almond extract
2 C confectioners' sugar (or more for desired sweetness)
1-2 drops of red food coloring
Sweetened coconut, for sprinkling

Cream together cream cheese, butter, vanilla and almond extracts. Add confectioners' sugar and mix until smooth and fluffy. Add in a drop or two of red food coloring until desired pinkness is reached. Frost the cupcakes and sprinkle with the remaining coconut.

Oh, and I should mention that to tote these little guys around, I used my handy cupcake caddy that I purchased at Bed Bath & Beyond about a year ago. I got my money's worth and have carried my cakes in style, from Key Lime in the Coconut to the Irish Car Bomb variety.

And if you see what you like, stay tuned next week for the cupcakes of the chocolate variety, pictured here. So what do you think? Are you a fan of the coconut-on-Easter tradition?

Wednesday
Apr072010

Honey Bran Breakfast Muffins

The question that torments me each morning...what do eat for breakfast? Somehow, I can never get into a routine about eating breakfast, unless a giant barrel of coffee counts as a meal. I'm not sure if it's that my stomach just isn't ready or I'm too pressed for time (read: lazy) to cook something in the morning, but breakfast is the one meal that I have trouble sticking with. Don't get me wrong...I love a giant, fluffy pancake as much as the next person and I can whip up the most delish scrambled eggs you've ever tasted...but on a daily basis? It's just not happening. But after I realized that a virtually unused carton of buttermilk (it was purchased and only slightly tapped into for Kathy's Irish Soda Bread) was about to expire, I just felt the need to salvage some by way of the muffin. So I pulled out my handy Muffin cookbook (which was the inspiration between my Apple Surprise Muffins and Snickerdoodle Muffins), searched for recipes containing buttermilk with at least a little health value. While the Blueberry Streusel was calling my name, I opted instead for the heart healthy and morning stomach pleaser, Honey Bran Muffins. This bran and fiber filled muffin isn't a pastry, but it's a filling way to get going in the morning.

Honey Bran Breakfast Muffins
*Adapted from Muffins
1 C boiling water
1 C raisins
2 1/2 tsp baking soda
1 1/2 C honey
2 3/4 C flour
1/2 tsp salt, optional
2 eggs
1/2 cup canola oil
2 C buttermilk
3-4 C wheat germ (I used Hodgson Mills) or unprocessed wheat bran

Preheat oven to 375 degrees. Line muffin tin with paper liners. Pour boiling water over raisins and add baking soda. Mix slightly (it's like a little chem lab in your kitchen!). In a large mixing bowl (I broke out my oversized red Tupperware mixing bowl, reserved for major batches of baking), lightly mix remaining ingredients together.Add raisin mixture and stir just until moistened.

(Note: it's important not to overmix. If you do, it will make the batter tough and just undelicious, so resist the urge to mix and mix).

Fill muffin cups 3/4 full.

Bake for 20 minutes or until the toothpick test comes out clean.

Some notes:

I'm not sure if they used muffin tins for giants or what, but I had a lot more than 12 muffins. My batch produced more like 24...so many that I ended up wrapping some in plastic wrap and freezing them. Now I can just pop 'em in the microwave and add a bit of light butter whenever I want one for breakfast.

The original recipe called for unprocessed wheat bran. Admittedly...I didn't know what this was and couldn't find it. Is it cereal? A box of plain old bran? Is it masquerading under another name? What I did find, however, was wheat germ, located in the cereal aisle. But I took a leap on wheat germ (close enough?) and who would have thought...it worked!

So there you have it. A healthy breakfast muffin with just a hint of sweetness added from the raisins. But what I really want to know is, how do you get down with breakfast?

Sunday
Apr042010

Chick Cake Pops

I hope you all had a fabulous holiday (if you were celebrating yesterday!). I ate Peeps, glazed ham and coconut cupcakes until I couldn't move (more on that later...) Moving on, today's recipe comes from TAA reader, Keri Campagna Klingman. Her truly adorable cake pops caught my eye and I just had to find out the recipe and steps to make it happen myself. Keri generously shared the recipe, providing step-by-step instructions and photos that are super sweet and tasty-looking to boot. Check it out...

Chick Cake Pops
Cake Mix
Frosting (one container)
Yellow Candy Melts
Milk or Dark Chocolate Candy Melts
Lollipop Sticks
Candy Coated Chips (for beak)
Sprinkles (hearts, flowers, circles, moons, anything to resemble wings and feet - my favorite are the hearts)
Styrofoam block
 
To make the pop:
1. Bake cake mix (any flavor desired) as directed and allow to cool.
2. When cool, take the cake and crumble it into a big bowl.
3. Take the cake crumbs and thoroughly mix in a container of frosting (any flavor desired) - you can use a hand mixer, spoon, or make it even more fun and get messy by using your hands!
4.Refrigerate this mixture for 2-3 hours.
5. After chilling, I use a cookie scoop and scoop out portions to shape into balls. (Size will vary depending on how big you want pop to be. I make them about the size of a small meatball - makes between 30 to 40 pops.)
6. Push lollipop sticks into cake balls and place on wax papered baking sheet. I refrigerate or freeze overnight for maximum firmness for dipping.
7. Melt yellow candy melts according to package (heat in microwave in 30 second intervals - make sure to stir melts between heating) I melt them in a deep narrow bowl to make it easier for dipping.
8. Dip pops into yellow chocolate. Once the cake ball is covered remove and softly tap and rotate until the excess chocolate falls off. Don’t tap too hard or the cake ball will fall off, too.
9. Place into styrofoam block to dry.
10. Once dry, use excess yellow chocolate and put into squeeze bottle. Use this chocolate to "glue" on sprinkles and candy coatings to make face. Use Milk/dark chocolate in another squeeze bottle to dab on eyes or you can use an edible ink pen to draw. (I like the chocolate look better)
11. Let dry & refrigerate.
It's a long process, but the outcome is so cute you really don't mind!! Plus, everyone raves about them - taste and cuteness! Everyone has their cake preference - my husband chooses devil's food cake with triple chocolate fudge chip icing. For these, I got seven orders for French Vanilla cake with vanilla icing. That combo made it easier to coat in the lighter color chocolate! Hope you enjoy!!!

Didn't Keri do an amazing job? Aren't these chick cake pops just about the cutest thing you've ever seen? Though Easter has come and gone, I might just need to find a reason to whip up these little chickies...

Psst...do you have a favorite recipe? Snapped a mouthwatering photo? Ate in a fun restaurant? Share your Avid Appetite by emailing theavidappetite [at] gmail [dot] com or visit the Contact page.