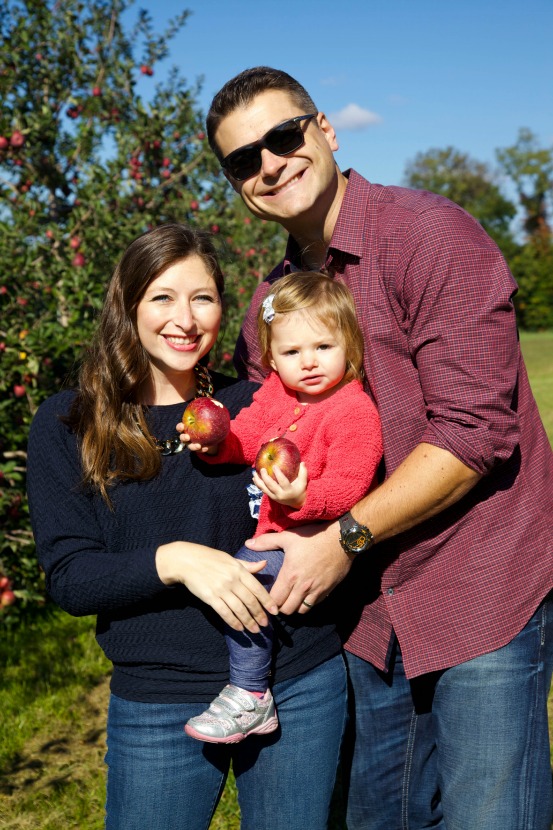
Hi, I'm Rachel.

A few years ago I could barely boil water.

True story.

Determined to be a kick ass wife, I developed a love for football and learned to cook in my tiny Jersey City kitchen. I spend my days working in Manhattan, my nights and weekends chasing after a rambunctious toddler, and the hours in between cooking with my husband and feeding my TV habit...oh, and I blog about it all! 

Welcome to my world!

Search for Recipes & More!

Subscribe via Email:

Delivered by FeedBurner

Still Hungry?
my foodgawker gallery
Search for Recipes & More!


Subscribe to TAA by Email!

Delivered by FeedBurner


Follow the Food

The Pantry

Entries in fall eats (35)

Monday
Nov162009

Start Spreading the Butter...Pumpkin Butter

Just when I thought my love of pumpkin had come to total fruition with my Ginger Snap Crusted Pumpkin Pie, I dug up this article from Smitten Kitchen. The idea of making my own pumpkin butter had never occurred to me, but after seeing SK's beautiful photos, I could almost smell the simmering fall spices that comprise this fabulous spread. Sure I could head out to Williams Sonoma and snap up this little 13 oz jar of deliciousness for $9.95, but really? It's pumpkin butter. And by making my own I have enough for a small army packed away in my fridge.

Less like actual butter and more like a jam or spread, pumpkin butter is pretty fabulous on just about anything...toast, breads, biscuits, by the heaping spoonful, and I've heard it's pretty fabulous swirled into some vanilla yogurt (the latter is yet to be personally tested). And the very, very best part? It couldn't be easier to make.
Initially adapted from Allrecipes.com, check out SK's recipe along with (of course) my own personal changes.

Pumpkin Butter
Adapted from AllRecipes
1 (29 ounce) can pumpkin puree, approx. 3 1/2 cups (I used 2 15oz cans)
3/4 cup apple juice (I used more like 1 full cup of the stuff)
2 teaspoons ground ginger
1/2 teaspoon ground cloves (Due to the pungent nature of cloves, I used only 1/4 tsp)
1 1/3 cups brown sugar
1 tablespoon ground cinnamon
1/2 teaspoon ground nutmeg
Juice of half a lemon (I left this out...mainly because when I got all my ingredients out and ready I realized that (gasp!) my fruit drawer had no lemons to speak of)

1. Combine pumpkin, apple juice, spices, and sugar in a large saucepan; stir well. Bring mixture to a boil. Reduce heat, and simmer for 30 minutes or until thickened. Stir frequently. Adjust spices to taste. If you are in possession of lemon, stir it in to taste.
2. Once cool, pumpkin butter can be kept in an airtight container in the fridge. Though the original recipe calls for actual 'canning' of the pumpkin butter, apparently this is highly frowned upon by government agencies. Not wanting to increase my risk for cancer, nor do I feel the need to learn anything about canning, I'm going with basic storage in the refrigerator.

So what do you think? Pumpkiny enough for you? Have any of you tried store-bought pumpkin butter - or any other butters for that matter - that've rocked your autumn world?

Thursday
Nov122009

Tales from the Tailgate

On Sunday, I attended my very first Giants game. After years (and years) of attending Jets games with my Jets-fan husband, I finally got to cheer on my team from lower tier seats at Giants stadium, as opposed to from my comfy couch. And of course no football experience would be complete without a proper tailgate. For my first Giants game, we went all out. Here's the menu:

1 six pack Miller Lite
2 bottles water
2 cans diet orange Fanta
2 Yurgers (see recipe below)
2 Nathan's hot dogs
1 bag potato chips
1 bag Tostitos
1 container onion dip
1 container chicken salad spread
Condiments such as ketchup, mustard, BBQ sauce
Before we get to the goods, can we take a moment for getting up close and personal with some of my favorite offense? (Though no Brandon Jacobs in this shot...)


Getting ready for the snap...Eli, Smith, Boss, Bradshaw

For the type of tailgate we designed, it required some help from our friends. And by friends I mean fancy tailgating appliances. We learned the hard way that when grilling in a windy parking lot, the charcoal chimney is a bonafide necessity. This little baby was a gift from my father-in-law and since we've added this to our tailgating repetoire, gettin' the grilling done has gone a lot more smoothly. Isn't she pretty? While I'm not sure where ours is from, you can find them on Amazon or at Target, Lowe's, Home Depot.

Of course, what's the point of the charcoal chimney without it's couterpart...the grill itself. Not sure how much tailgating we'd actually do this season, we snapped up this little guy at Target for a mere $29.99. Though a bit low to the ground, this little grill has been the perfect cooking tool for steaks, burgers, and dogs alike, and it's inexpensive to boot. Being as it's made it through at least 4 tailgates this season and still going strong, we've already gotten our money's worth.
Chimney + baby grill = a match made in tailgating heaven, don't you think?

Though I always try to take the reigns when it comes to cooking (because I love it so much), I leave the grilling to my very own personal Grill Master, Shaun.

The finished product. A perfectly cooked doggie with my favorite combo of mustard and ketchup, and Shaun's recreation of the Yurger - apparently a tailgating favorite created by none other than a fellow Giants fan. Though he altered the recipe a bit (no veal for this lady) the Yurgers were soft, juicy and basically the perfect tailgate companion. Check out his alterations below.

And of course no grill or burger would be complete without the perfect barbeque sauce. Though we've tried a few, our favorite thus far is the Olde Cape Cod Black Angus BBQ & Grilling Sauce. A perfect combo of smokiness, savory, and sweetness, this bbq sauce is a must. And no tailgate would be complete without my brandy new Giants t-shirt jersey featuring number 27, Brandon Jacobs.

So that's the tale of my first Giants tailgate. I guess I should mention the actual game while I'm at it. While the game was so exciting and we had a gorgeous night outside, unfortunately the Giants lost in the last few minutes of the game. Huge disappointment for this Giants fan (especially since they've been on a seriously downward spiral in the losing department). But the experience itself? Amazing. So much fun. I highly recommend it.

 Eli plotting his throw...Smith ramping up for a reception!

Shaun's Yurgers recipe:
1 lb ground sirloin
Shredded cheddar cheese (eyeball it)
Minced onion to taste
Chili powder to taste (this gives burger the flavor)
Salt/pepper to taste
Olde Cape Cod Black Angus BBQ sauce

Mix altogether, adding the BBQ sauce a little at a time so the mixture isn't too wet. Ok, it's not an exact science and the measurements are vague. But they came out fabulously! Just add the ingredients to your own taste (my favorite kind of recipe)! For the original, go here.

Tuesday
Nov102009

Taste of Fall: Ginger Snap Crusted Pumpkin Pie


Though I may have alluded to my pumpkin obsession, I'm not sure that I've really expressed the seriousness of the situation. I love pumpkin. There I said it. I LOVE PUMPKIN! It is really one of my favorite flavors and ingredients. Since it only makes an appearance for a short time during the year, I try to soak up as much pumpkin as possible. This past weekend I whipped up one of my favorite, down home desserts - a traditional pumpkin pie.

If you love pumpkin and/or are looking for a great Thanksgiving dessert, give this one a whirl! Just one thing I need to mention. I beg you - if you do one thing with this recipe, please please please make your own crust. It seriously is the easiest part and you cannot believe the difference. Take it from my own personal experience: The first time I made this pumpkin pie, I used a pre-made crust. While the pumpkin part was obviously delicious and wonderful, the crust...not so much. And in my personal opinion, the crust is just as important as the pie. And since this super simple crust is easy as pie, there are no excuses. Homemade crust is a must! Ok, I'm now off my soapbox. Let's get down to the recipe.


Delicious pumpkin pie, made possible by some standard fall ingredients! 
Crust:
For the crust, I changed up the traditional graham cracker for ginger snaps. While I still think graham cracker crusts are fabulous, I wanted to try something new for this recipe. If you're not into ginger snaps, substitute 24 graham crackers for the 24 ginger snaps.
24 Ginger Snap cookies
1/2 stick butter, melted

Pie:
The pie filling is adapted from the classic LIBBY'S recipe. You can view the original ingredients below and note my changes in parentheses. 
3/4 cup granulated sugar
1 teaspoon ground cinnamon
1/2 teaspoon salt
1/2 teaspoon ground ginger
1/4 teaspoon ground cloves (I used 1/8 tsp cloves and 1/8 tsp nutmeg)
2 large eggs
1 can (15 oz.) LIBBY'S® 100% Pure Pumpkin (Make sure you use pure pumpkin, not pumpkin pie filling!)
1 can (12 fl. oz.) Evaporated Milk (I took this opportunity to cut a little fat and used Fat Free Evap Milk)
1 unbaked 9-inch (4-cup volume) deep-dish pie shell (Noooooo! See above rant and subsequent crust recipe)
Whipped cream, optional (If you know me at all, you know that this is in no way optional)

Put it all together:
- Preheat oven to 350 degrees.

- Place ginger snaps in food processor and process until coarse crumbs - but don't over-blend!

- In microwave, melt butter. Then, add melted butter to processed ginger snaps in food processor. Pulse a few times until butter is combined.


- Press ginger snap crumbs into 9-inch pie plate. You may need to roll up your sleeves on this one and get your hands dirty - make sure crust is evenly pressed into plate.

- Bake crust for 8 - 10 minutes and then let cool.

- Change oven temperature to 425 degrees.

- In mixing bowl, mix sugar, cinnamon, salt, ginger, nutmeg and cloves in small bowl.


- Beat eggs in large bowl. Stir in pumpkin and sugar-spice mixture. Gradually stir in evaporated milk.

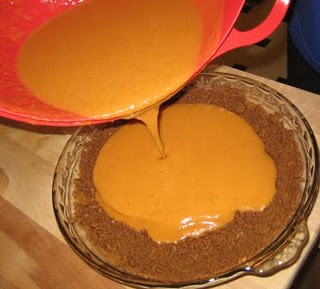
- Pour into pre-baked, homemade pie shell - for the love of food, not the prebought kind!!


- Bake in preheated 425° F oven for 15 minutes.

- Reduce temperature to 350° F; bake for 40 to 50 minutes or until knife inserted near center comes out clean. Cool on wire rack for 2 hours.


- Top with (lots o') whipped cream and ENJOY!

- Tip: This pie tastes best the day after. Let cool completely, cover with plastic wrap and foil, refrigerate, and eat the next day. The flavors are stronger (in a good way) and the crust is softer.

Looks tasty, doesn't it? So what do you think? Any other fabulous pumpkin recipes out there? If so, don't hold out on me! I only have a limited time to get my fill!