This project started with 3 things.
Perserverance. Comfortable shoes. Clothes we didn’t mind dirtying. And iron stomachs.
Ok so 4 things. All equally as important though.
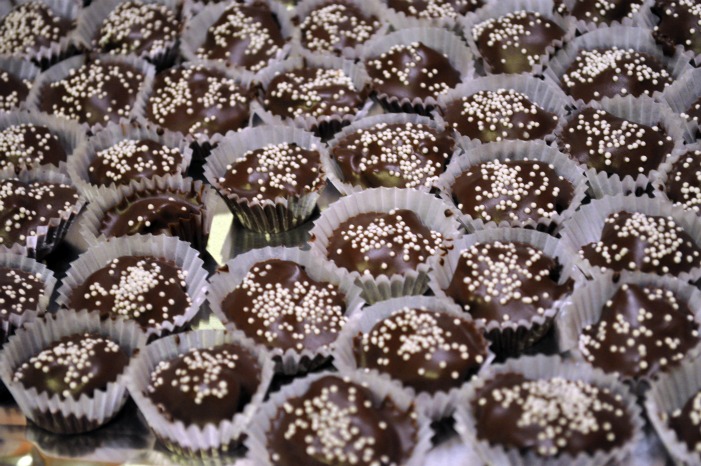
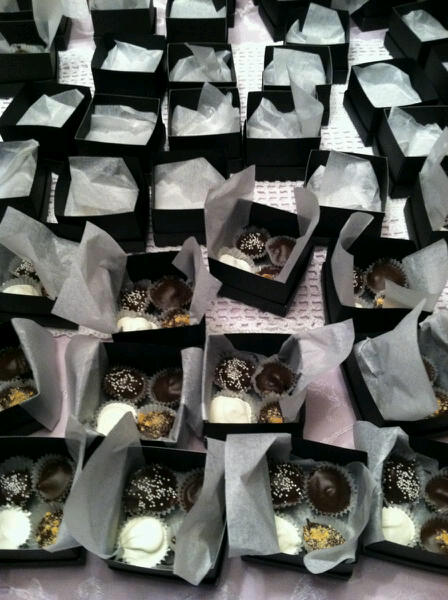
To make 350+ truffles for my best friend Lindsey’s engagement party a few weeks ago, we truly got our DIY on. Lindsey wanted to have little favor boxes filled with truffles as the party favor.
After a trip to Michael's for all of our supplies, we spent most of a Saturday melting chocolate, mixing filling, and, of course, sampling the goods. It was a fairly simple, yet time-consuming project. So if you too want to make truffles, here's a few things you'll need:
1. The double boiler. I highly recommend this tool. You can absolutely use the glass bowl over the saucepan trick, but since we were melting chocolate for about, oh 8 hours, the double boiler really came in handy. Thanks to bridesmaid Jenny for supplying this wonderful tool (that I'm admittedly a little obsessed with now).
2. Good chocolate. Not to go all Ina on you with the pretentious ‘good’ ingredients (I still love ya girl!), but since you are eating this chocolate straight, please, for the love of your sister (or brother. or parents), use good chocolate that you would happily consume raw. Because you will. Ya dig?
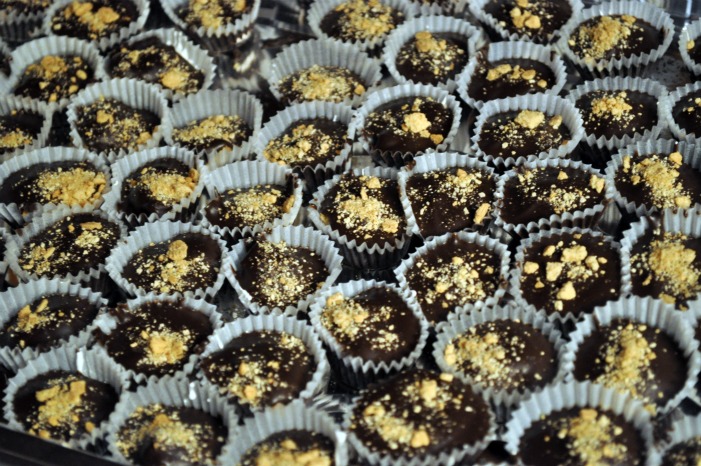
3. Mini mini baking cups. We got them at Michael's. Separating each cup from the stack was a feat in itself, but well worth it because they were so darn cute.
4. Giant trays. You'll want to load up your mini cups on to some giant baking trays (so they can each rest comfortably, no smooshing together please) for filling.
5. Packaging. We used favor boxes. Decide what you want to use these for and go from there. If you are bringing some to a party, perhaps set them up on a pretty platter with little flags denoting the flavors. Cheeseboard style...

6. Good company.

7. Some treats for the chefs.

bonus for stemless glassware since the last thing you want are broken wine glasses around your chocolate making.
How we did it
1. Lay out the baking cups and melt the chocolate. Spoon just enough melted chocolate into each cup to cover just the bottom. Set them aside to harden. We did not need to refrigerate or freeze them. A solid 20 minutes of sitting out on the counter top should do it.
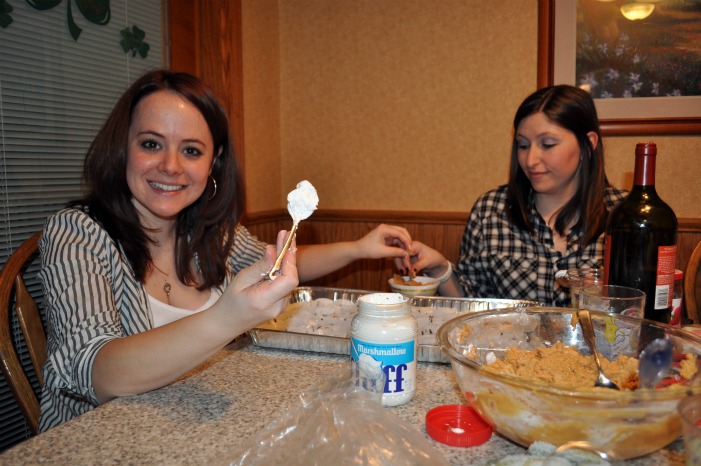
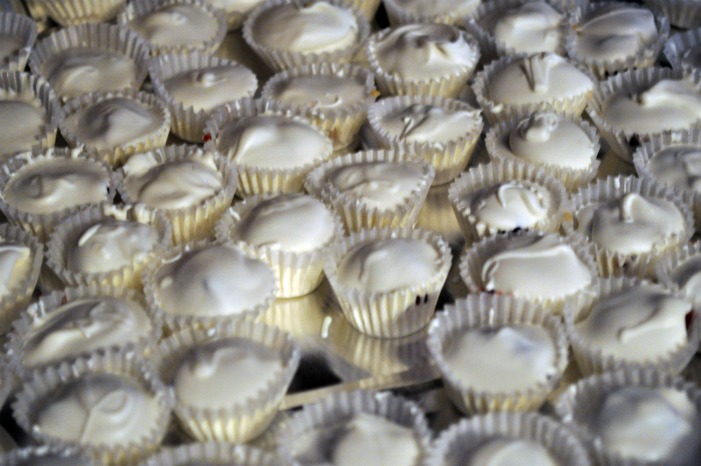
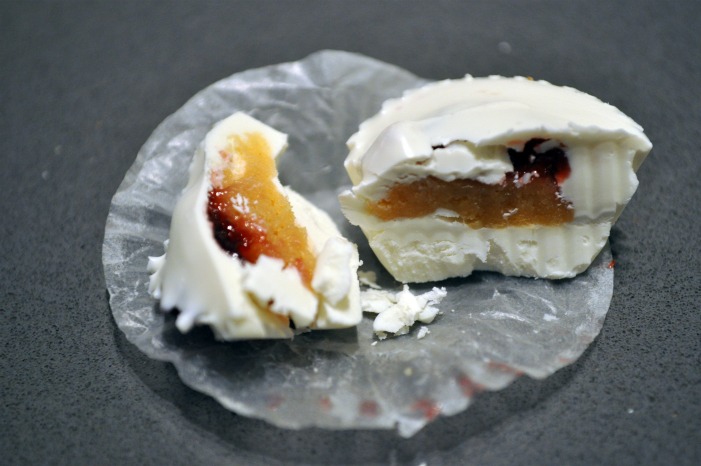
2. Once hardened, get a tag team going on filling them. Use any filling ya like! We used pb+j, graham crackers + fluff, and Oreos to make 4 different flavors. Be creative!
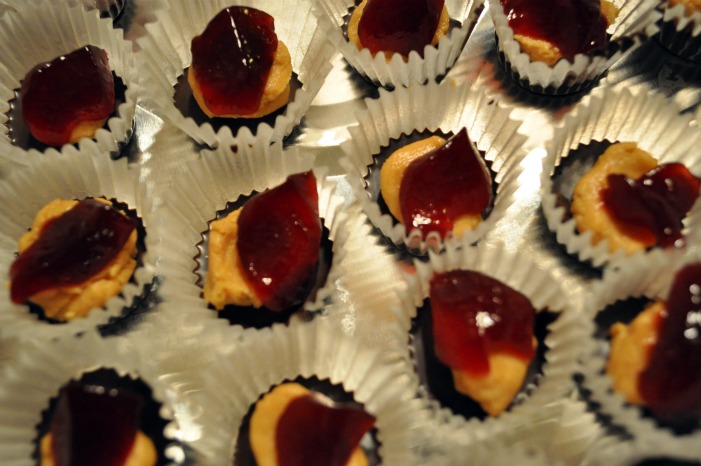
3. Once your cups are filled (we tackled one variety at a time), it's back to the stove for more melted chocolate. With a spoon, cover the truffle filling with melted chocolate. Now is also the time to put someone on topping duty. If you want to add sprinkles or any kind of garnish (like crushed up graham crackers), then go ahead and add them now before the chocolate hardens.
Some more tips:
Decide on how many you are going to make, and then make at least 10 more of each variety. There will undoubtedly be some rejects in the pile. Trust me on that one. Plus, you need some samples for taste testing.
This project was made easier by all the help that was had. We had a team of 5 people working on various baking projects for the party, with Lin and I primarily on truffle duty. Lots of company and iTunes made this project fun.
Have fun! You are making chocolate after all.
So what do you think? Have you ever tried candy-making? How about cooking or baking on a large scale?
psst...The Book Club page is up and running! Head over to check it out, along with my first write up of Lisa See's Shanghai Girls.